In a previous article we looked at a simple DIY solar panel system that could get the average home powered up with solar, using a modular installation kit. While calling it DIY is completely accurate, it is important to consider that the installation of a full solar panel system is not always a one person “do it yourself” job. You probably need to include a friend or family member to give you a hand. But that’s not unlike any other large DIY job, like putting up a fence or building a deck. Just like those projects, installing a solar panel system requires some help, and a checklist of tools and gear required to tackle the job.

DIY Solar Panel Kits make installation simple and safe.
Of course, before you jump in and invest in the gear and the equipment, it does pay to ask yourself a serious question: What are the benefits of installing my own solar power system? If you’ve gotten this far, then you’ve already run the math and determined that the financial figures add up when it comes to energy savings. Additionally, since you’ll benefit directly from all of the federal and state energy rebates, you’ll pay less for all the solar hardware, as well. Lastly, doing the installation will completely eliminate the expense of hiring a company to do the work for you.
Or, maybe you haven’t spent a whole lot of time looking at all those details and their specific benefits. Instead, you just enjoy the great feeling of accomplishment from completing projects like this, and you look at all the financial benefits, as a bonus. Either way, you’re about to get knee deep in a serious project…
An important factor to consider is your roof. Determining if the roof is in the best condition to be covered with panels for the next 20-25 years, is probably one of the most critical considerations for a do-it-yourself solar panel project. After all, you can have someone come in and remove the solar panel system, get the roof replaced, and re-install the panels. This will cost you at least an additional $1000. That’s not a small amount of money and it kind of defeats the whole point of installing the solar panels yourself, in the first place. Read our article about some additional things to consider, before you go solar: Ask these Questions, Before you Buy Solar!
Also, be honest with yourself about the wiring. Inaccurately hooking panels up can ruin an inverter or destroy the wiring. It may be worthwhile to do the solar panel racking installation yourself, but let a solar installer or electrician tackle the wiring process. If you have a family member or friend with expertise in home electrical systems or experience with solar wiring, this could be a great time to ask them for a hand. They might even be excited to be involved in your project. The good thing is, family and friends always work cheap. If you decide to do the wiring yourself, then pay close attention to electrical safety. It’s smart to double check your wiring, then go “live”.
Before you begin your solar panel installation project, you’ll need the right tools and gear to make sure you’re prepared for the work. The most common list of tools and gear includes:
The best DIY Solar Panel Kits we’ve seen are offered by Go Green Solar. These kits come with all of the main hardware components that you need to install a solar power system. One of the key benefits is that they are modular kits with quick connect wiring and micro inverters, which make the system simple and safe to install. If you’ve used the Go Green Solar kit or others, please share your experience with our readers in the comments section, at the end of this article. We would love to hear about it.
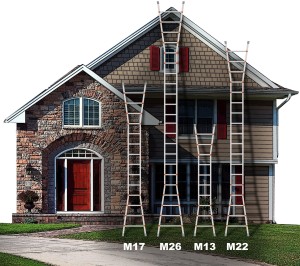
Of course you’ll need a ladder, the Little Giant Alta One is a multi-purpose system that can transform into an extension ladder, A-frame ladder, staircase ladder, and it can be used as a trestle-and-plank scaffolding system. It can be adjusted to reach a maximum height of 17 feet, but can be reduced down to under 5 feet for smaller jobs or storage. If you’ve never seen one of these ladder systems before, it’s worth checking out here.
Don’t forget the safety harness gear for fall protection! Yes, you’re cool because you’re installing your own solar power system, but not cool enough to survive a fall from your roof. The Guardian Fall Protection Bucket of Safe-Tie includes a heavy-duty temper anchor, 50-foot vertical lifeline assembly and a safety harness. Be a buddy and get one for your friend(s) helping you, too. Otherwise, this could be a terrible way to end a friendship.
Custom Leathercraft Handyman Flex Grip Work Gloves are like something from Mad Max, but this is what modern work gloves are supposed to look like. And no, they don’t come in a 3-pack for $6, but they’re not expensive, either.
Man, by the time this job is over you’ll be glad you had these DEWALT DG5204 Professional Kneepads. The most important parts of these pads are their layered gel and closed-cell foam padding that give you a really comfortable, knee saving fit.
You’ll need a good wire stripper, like the Irwin Industrial Tools 8-Inch Self-Adjusting Wire Stripper with ProTouch Grip. This self adjusting wire stripper can handle wire from 10-24 AWG. It’s soft grip handle has a great feel and helps to avoid hand fatigue. Bonus – it’s also a wire cutter and crimper.
With this project, you’re probably going to put your cordless drill to the test. If it’s time to pick-up a new one, check out the DEWALT DCD771C2 20V MAX Lithium-Ion. It’s a compact Drill/Driver tool, so you can use it for drilling pilot holes for your rack support and for attaching the racks and solar panels. An important tip while you’re doing the job, is to always keep one battery charging, so you never run out of juice.
We just mentioned the rack support in the section above. Now, this is one of the reasons why professional installers have such a huge advantage over a do-it-yourself installer. The pros have been doing this for a long time and the process of finding the rafters under the roofing shingles has become an art to them. Many of them can feel their way on the roof to find the exact points where they need to drill the holes for the rack supports. Chances are, you’re not going to have it that easy.
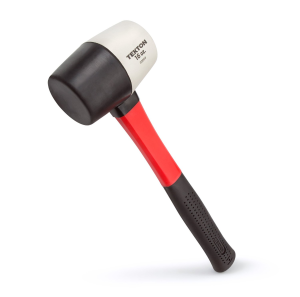
There are a variety of tools that can help you with this process, but this is one of those situations where a tool might not be able to do the job for you. You can try a rubber mallet to feel and listen for the rafters, or a variety of stud finders like the very expensive Bosch D-Tect150 D-Tect Wallscanner or the much more affordable ProSensor 710 Franklin.
If you have a tile or metal roof, this process can be even more difficult. In those situations, it may require measuring the rafters in the attic and translating those measurements to the outside of the roof. Additionally, you may need to drill some exploratory holes to pinpoint the exact locations of the rafters.
You’ll also need a variety of other tools and supplies to complete this project, some of which you may already own. They include a socket set, drill bits, screw drivers(flat and Phillips), caulk gun, sealant, a tool belt, latex gloves, a level, tape measure, pencil, chalk and a torque wrench.
Lastly, you’re going to be spending lots of time on your roof, possibly in the hot, beating sun, so don’t forget some essentials like a hat, sunscreen and plenty of water. Don’t try to be a hero, you may have to extend this project for multiple weekends. That’s ok, you want to make sure it’s done right.
Remember, too, that you will have to confirm that your project meets all of your local regulations and guidelines. You need to be sure that you comply with any local, state and even national safety or building standards. You’ll be required to get approval from your town or city inspector and make sure that all coding guidelines are met throughout the installation.

You can do it!
One thing to consider, before taking on a huge project like this one, is that maybe you want to do a training project to get familiar with the process of installing a solar panel system. A small solar panel project on your shed or garage, might help to give you a better feel for the nuance of finding exactly where the rafters are located on the roof and help you determine how long it will take to you complete the much larger job of a solar panel system to power your entire home.
This is an exciting time for solar power. With the availability of DIY solar panel kits you may be able to make the shift from grid power to an entirely renewable, solar energy powered home, in a few weekends. Just take time to hone your skills, compare costs, and get your checklist of tools and gear together, before your start your project. After all, your solar panel system will provide you with the benefits of free power for next 20 years, or more. You’ll want to make sure you’re prepared for a project like this, because that’s how you’ll guarantee that it’s done right.
You’ll also like:
Ask these Questions, Before you Buy Solar!
Escape to Tiny House living with Big Home Comforts
How to Guide: Choosing the right Solar Company
Want more interesting articles, reviews and insights like this one?
Sign-up for our weekly updates, below:


Leave a Reply